https://www.dropbox.com/sh/b0gy9bvzb8bd3g1/ENYpZdnrIV
WEB BASED TOOL TO QUERY SOFTWARE METRIC REPOSITORY
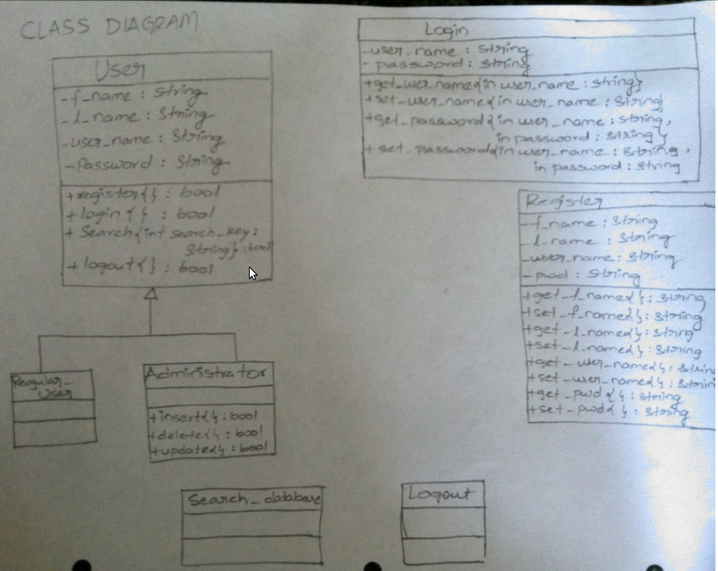
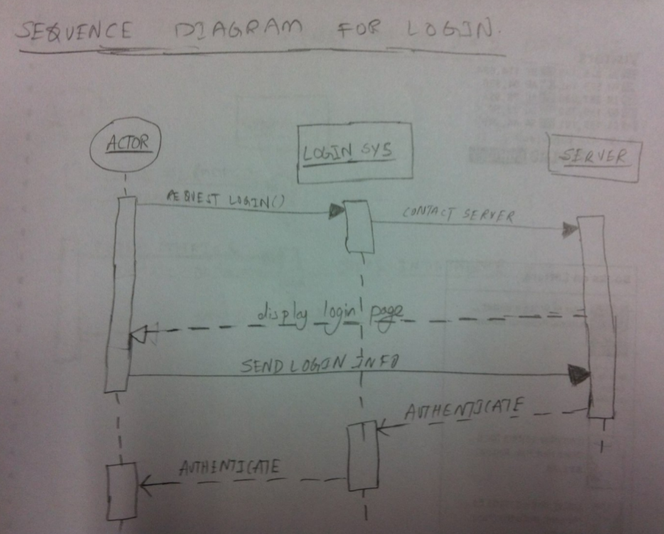
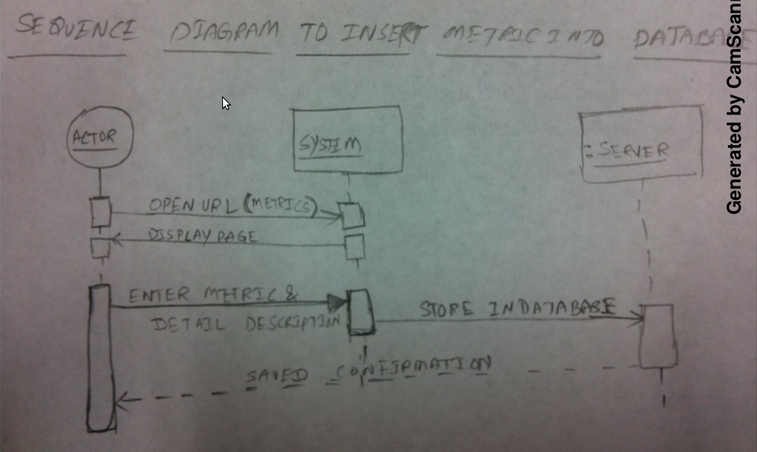
INSTALLATION MANUAL We need to start by installing LAMP (Linux Operating System, Apache2,Mysql and PHP) Install Apache To start off we will install Apache. 1. Open up the Terminal (Applications > Accessories > Terminal). 2. Copy/Paste the following line of code into Terminal and then press enter: sudo apt-get install apache2 3. The Terminal will then ask you for your password, type it and then press enter. Testing Apache To make sure everything installed correctly we will now test Apache to ensure it is working properly. 1. Open up any web browser and then enter the following into the web address: http://localhost/ You should see a folder entitled apache2-default/. Open it and you will see a message saying "It works!" , congrats to you! Install PHP In this part we will install PHP 5. Step 1. Again open up the Terminal (Applications > Accessories > Terminal). Step 2. Copy/Paste the following line into Terminal and press enter: sudo apt-get install php5 libapache2-mod-php5 Step 3. In order for PHP to work and be compatible with Apache we must restart it. Type the following code in Terminal to do this: sudo /etc/init.d/apache2 restart Testing PHP To ensure there are no issues with PHP let's give it a quick test run. Step 1. In the terminal copy/paste the following line: sudo gedit /var/www/testphp.php This will open up a file called phptest.php. Step 2. Copy/Paste this line into the phptest file: <?php phpinfo(); ?> Step 3. Save and close the file. Step 4. Now open you're web browser and type the following into the web address: http://localhost/testphp.php The page should look like this: Test PHP Page Install MySQL To finish this guide up we will install MySQL. Step 1. Once again open up the amazing Terminal and then copy/paste this line: sudo apt-get install mysql-server Step 2 (optional). In order for other computers on your network to view the server you have created, you must first edit the "Bind Address". Begin by opening up Terminal to edit the my.cnf file. gksudo gedit /etc/mysql/my.cnf Change the line bind-address = 127.0.0.1 And change the 127.0.0.1 to your IP address. Step 3. This is where things may start to get tricky. Begin by typing the following into Terminal: mysql -u root -p Following that copy/paste this line: mysql> SET PASSWORD FOR 'root'@'localhost' = PASSWORD('softcode'); Step 4. We are now going to install a program called phpMyAdmin which is an easy tool to edit your databases. Copy/paste the following line into Terminal: sudo apt-get install libapache2-mod-auth-mysql php5-mysql phpmyadmin After that is installed our next task is to get PHP to work with MySQL. To do this we will need to open a file entitled php.ini. To open it type the following: gksudo gedit /etc/php5/apache2/php.ini Now we are going to have to uncomment the following line by taking out the semicolon (;). Change this line: ;extension=mysql.so To look like this: extension=mysql.so Now just restart Apache and you are all set! sudo /etc/init.d/apache2 restart Copying code folder to www sudo cp -R /home/bernard/Desktop/project /var/www sudo cp -R source target Creating Database Note: PhpMyAdmin can only import and export databases up to 50 MB in size. If your database is larger you will need to use SSH instead of phpMyAdmin. Open phpmyadmin, if phpmyadmin does not work Firstly check if the directory called /usr/share/phpmyadmin/ exists. If it does, just move it to /var/www/phpmyadmin by executing this command: sudo mv /usr/share/phpmyadmin /var/www/phpmyadmin Open your browser and open http://localhost/phpmyadmin. Now it should work. Note that, user name is root and password is softcode Login to the Bluehost cPanel of the phpmyadmin Under the category "Databases", click on phpMyAdmin create the database called firstdb On the left column, select the database name you wish to import to Along the top of the screen click the "Import" tab Click browse under "File to Import" and locate the Metrictable.sql file on your computer(code folder) After you have selected the file, click GO and it will import your database. The metrictable can be updated from here (Mysql). Make sure Database password is also softcode Now the application is up and running. To login as ADMIN: http://localhost/project/adminpage.html Username – admin Password - admin To login as USER: http://localhost/project/userpage.html Username – student Password - password This week we will meet has a team to work on how to get our working software ready for the presentation and design the UML diagram ( Class diagram and Sequence diagram) for the documentation required.
This week we have to compiled all metrics gathered by each member of the group. Now we have about 30 metrics to load into our database repository.
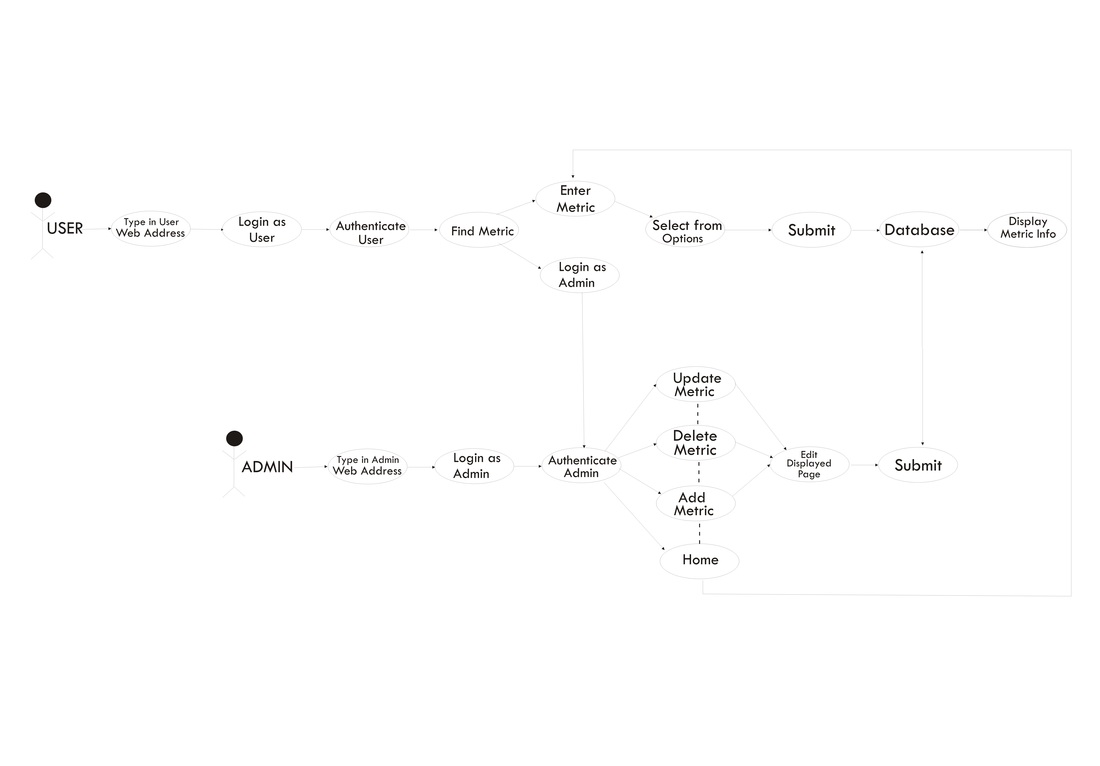
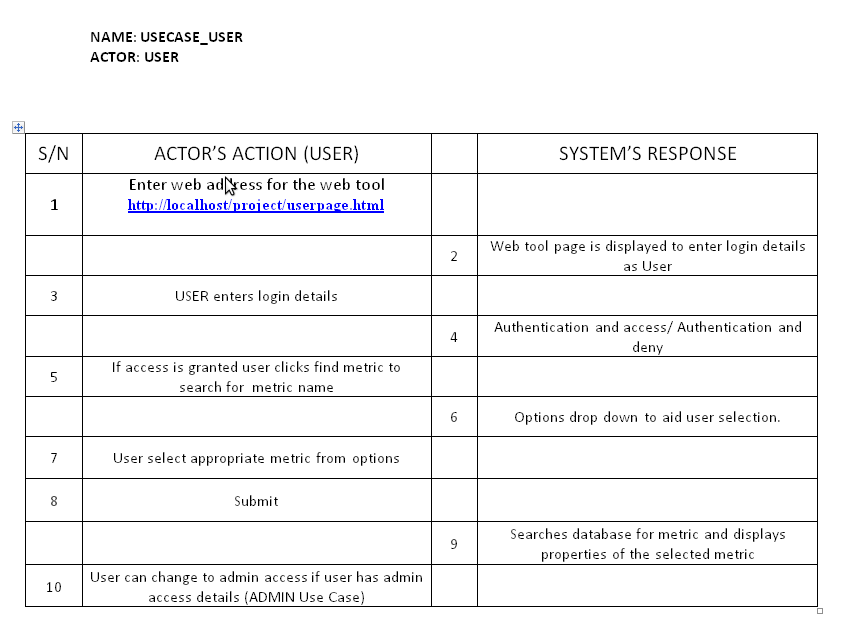
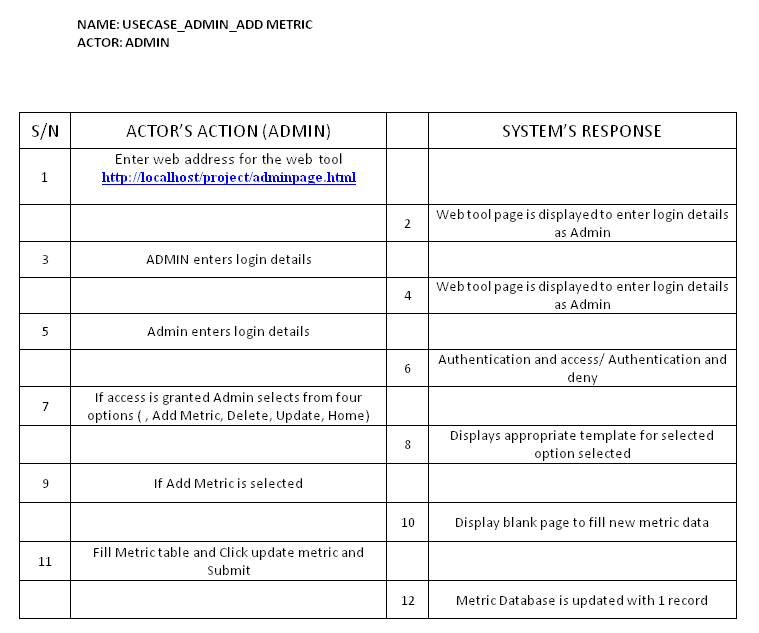
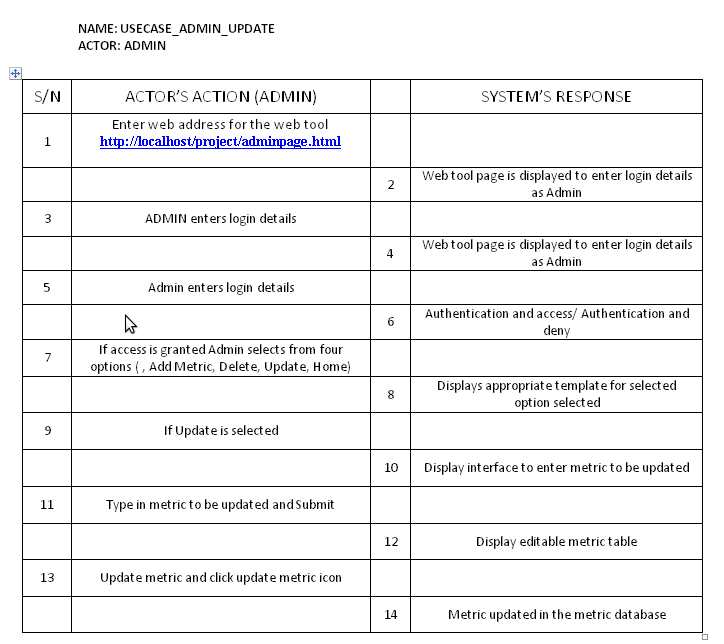
Use Case : Web Based Tool To Query Software Metric Repository Actor : Programmer Steps: Table below 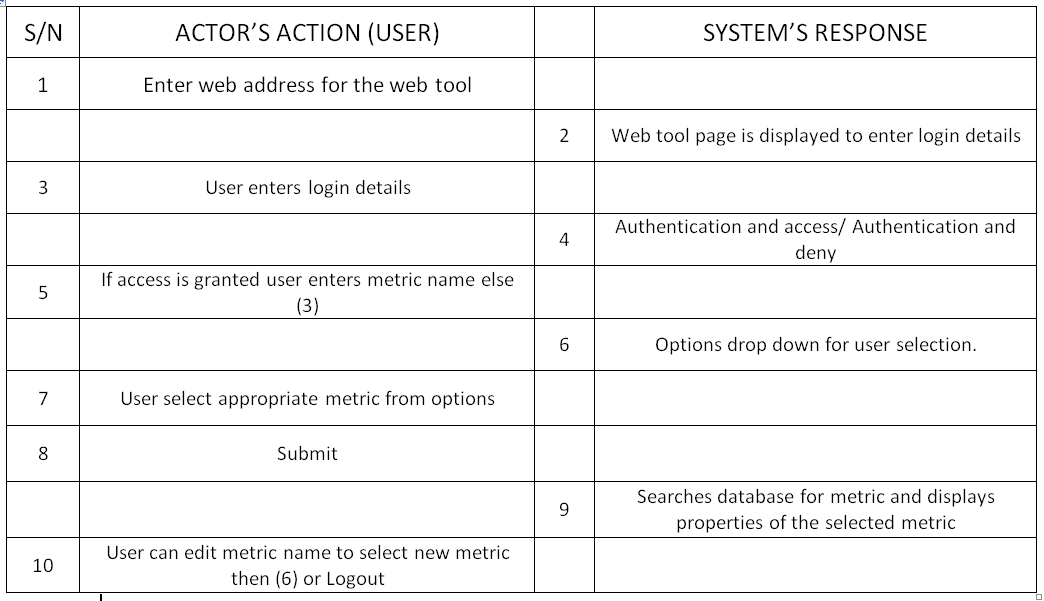 Use Case : Manage Web Based Tool To Query Software Metric Repository Actor : Application Designer/ Administrator Steps: Table below 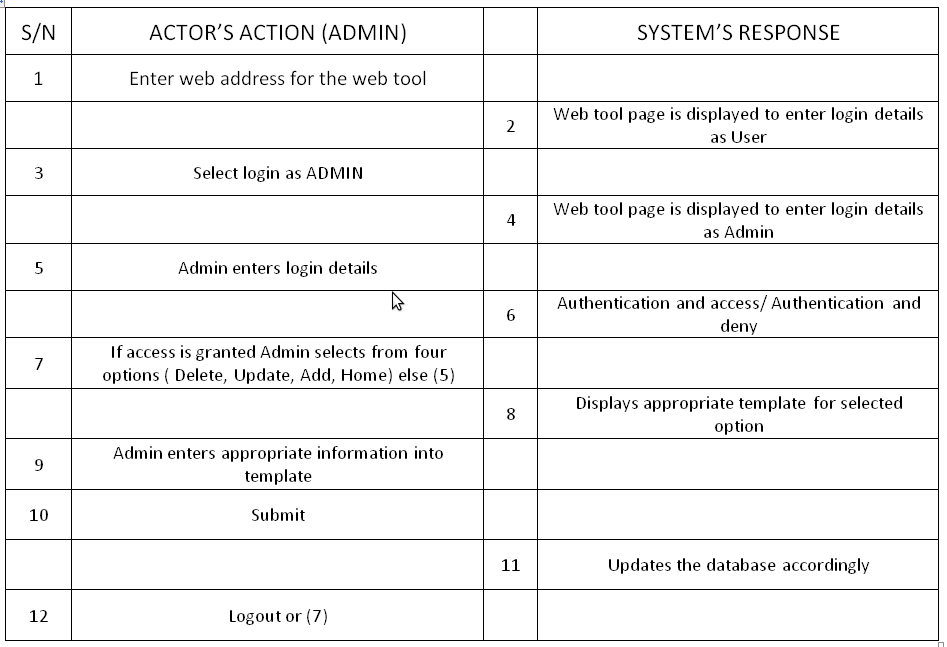  | AuthorSoft-Code Team ArchivesCategories |


 RSS Feed